Thursday, June 2, 2016

Bye Bye 4th Graders!!

Last art club meeting was spent painting signs for the art show. I am so thankful for these kiddos. They make our art show look beautiful! Each sign was themed around a special artist that was studied during that year. I am going to miss these creative artists.

Happy summer!


Sunday, May 15, 2016

Finished Paintings

I missed posting these great final paintings and hand sculptures.
Please take a look...the hard work was worth it!


- Thanks for visiting!
Mrs. Jarrett

Soft Sculpture Stitching & Sewing

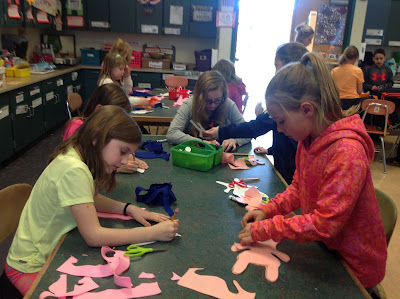
Our last art club project was a soft sculpture. Students chose from a selection of patterns or designed their own. We used felt and embroidery thread to stitch designs into their pattern. Eyes, feathers, scales, and fur were added to fish, owls, snakes and bunnies. Kiddos then pinned their two felt pieces together because their 2-D shapes were to become 3-D sculptures. They learned the loop stitch and sewed their two pieces together, leaving a hole to stuff. Once stuffed, their animals came to life. This was a new medium and technique for most students, but they caught on fast and really enjoyed the process!


Monday, March 14, 2016

Art Club T-Shirts

Thanks to Mr. Jarrett the originally designed Art Club t-shirts are finished! We wore them as a group on Friday, March 12th to celebrate National Youth Art Month. The arts rock here at UDA and so do we in our cool shirts.


Hand Sculptures

Art Club kiddos are making sculptures of their hands in various positions. First we had to wrap our hands and wrists with saran wrap  in order to get our hands out of the sculpture safely. We used buddies to help us because doing this with one hand is pretty impossible.

Next we wrapped our hands with duck tape. Two layers to be sure! Students carefully cut the tape to let their hands free. It was hot up there! Next we will stuff the sculptures to give it good solid form and structure.

Evelyn & Gracie G.

Emilee & Ava

Gabe, Gavin & Bryson

Cheyenne & Jonah

Painting comes next...


Sunday, February 14, 2016

Grid Paintings Continued...


Griding a Canvas

Students learned how to use the griding technique to enlarge an image. Students brought in a desired picture that they wanted to paint. They created a 1 inch grid on a canvas using a ruler. They followed a transparency grid to enlarge their image on a canvas. All detail was included. Students learned to break down each box into small lines and shapes. When they were finished they ended up with a picture that was four times the size of their original image.


Ta-Da! Clay Monsters